Machine Vision
Robust Circle Detection with OpenCV: Hough Transform & More
Learn how to use OpenCV and techniques like the Hough Transform to implement robust circle detection algorithms that are invariant to color and size variations in images.
Learn how to use OpenCV and techniques like the Hough Transform to implement robust circle detection algorithms that are invariant to color and size variations in images.

This article provides a step-by-step guide on how to detect circles in an image using OpenCV in Python. The process involves preprocessing the image, detecting edges, applying the Hough Circle Transform, filtering the detected circles, and finally, drawing the circles on the original image.
Preprocess the image:
gray = cv2.cvtColor(image, cv2.COLOR_BGR2GRAY)
blurred = cv2.GaussianBlur(gray, (5, 5), 0)
Edge detection:
edges = cv2.Canny(blurred, 50, 150)
Hough Circle Transform:
circles = cv2.HoughCircles(edges, cv2.HOUGH_GRADIENT, dp=1.2, minDist=20, param1=50, param2=30, minRadius=10, maxRadius=50)
Filter detected circles:
Draw detected circles:
cv2.circle() function to draw the detected circles on the original image.Example code snippet:
import cv2

# Load the image
image = cv2.imread('image.jpg')

# Preprocessing
gray = cv2.cvtColor(image, cv2.COLOR_BGR2GRAY)
blurred = cv2.GaussianBlur(gray, (5, 5), 0)

# Edge detection
edges = cv2.Canny(blurred, 50, 150)

# Hough Circle Transform
circles = cv2.HoughCircles(edges, cv2.HOUGH_GRADIENT, dp=1.2, minDist=20, param1=50, param2=30, minRadius=10, maxRadius=50)

# Draw detected circles
if circles is not None:
    circles = np.round(circles[0, :]).astype("int")
    for (x, y, r) in circles:
        cv2.circle(image, (x, y), r, (0, 255, 0), 2)

# Display the result
cv2.imshow("Detected Circles", image)
cv2.waitKey(0)
Note: Adjust the parameters of HoughCircles() and filtering criteria based on the specific image and application.
This Python code uses OpenCV to detect circles in an image. It loads the image, preprocesses it by converting to grayscale and applying Gaussian blur, detects edges using Canny edge detection, and then applies Hough Circle Transform to find circles. The code then filters the detected circles based on radius and draws the remaining circles on the original image. Finally, it displays the image with the detected circles.
import cv2
import numpy as np

# Load the image
image = cv2.imread('image.jpg')

# Preprocessing
gray = cv2.cvtColor(image, cv2.COLOR_BGR2GRAY)
blurred = cv2.GaussianBlur(gray, (5, 5), 0)

# Edge detection
edges = cv2.Canny(blurred, 50, 150)

# Hough Circle Transform
circles = cv2.HoughCircles(edges, cv2.HOUGH_GRADIENT, dp=1.2, minDist=20,
                           param1=50, param2=30, minRadius=10, maxRadius=50)

# Draw detected circles
if circles is not None:
    circles = np.round(circles[0, :]).astype("int")
    for (x, y, r) in circles:
        # Filter circles based on size (example: radius between 20 and 40 pixels)
        if 20 < r < 40:
            cv2.circle(image, (x, y), r, (0, 255, 0), 2)

# Display the result
cv2.imshow("Detected Circles", image)
cv2.waitKey(0)
Explanation:
cv2 for image processing and numpy for numerical operations.'image.jpg' with the path to your image file.HoughCircles function to detect circles in the edge image. Adjust the parameters as needed for your specific image.cv2.circle().cv2.imshow().Remember to adjust the parameters and filtering criteria based on your specific image and application.
Preprocessing:
Edge Detection:
Hough Circle Transform:
cv2.HOUGH_GRADIENT: The standard method for circles.dp: Inverse ratio of accumulator resolution to image resolution. Higher dp = fewer accumulator bins = faster but less accurate.minDist: Minimum distance between detected circle centers. Prevents clustering of circles on the same feature.param1: Canny edge detector's higher threshold (passed to Canny internally).param2: Accumulator threshold. Lower value detects more circles (including false ones).minRadius, maxRadius: Limit detected circle sizes. Useful when you have an idea about the target circle dimensions.Filtering Detected Circles:
Drawing Detected Circles:
cv2.circle():
(x, y): Circle center coordinates.r: Radius.(0, 255, 0): Green color (BGR format).2: Line thickness.General Tips:
This article provides a step-by-step guide to detecting circles in images using OpenCV and the Hough Circle Transform algorithm.
Here's a summary of the process:
Image Preprocessing:
Edge Detection:
Hough Circle Transform:
cv2.HoughCircles() function on the edge-detected image to detect circular shapes.dp, minDist, param1, param2, minRadius, maxRadius) to optimize circle detection for specific images.Circle Filtering:
Circle Visualization:
cv2.circle() function for visual confirmation.Key Points:
HoughCircles() function and filtering criteria are crucial for accurate circle detection and depend on the specific image and application requirements.By following these steps, you can effectively detect circles within images using OpenCV and Python. Remember that fine-tuning parameters and applying appropriate filtering techniques are crucial for achieving optimal results based on the specific characteristics of your images and the goals of your application.
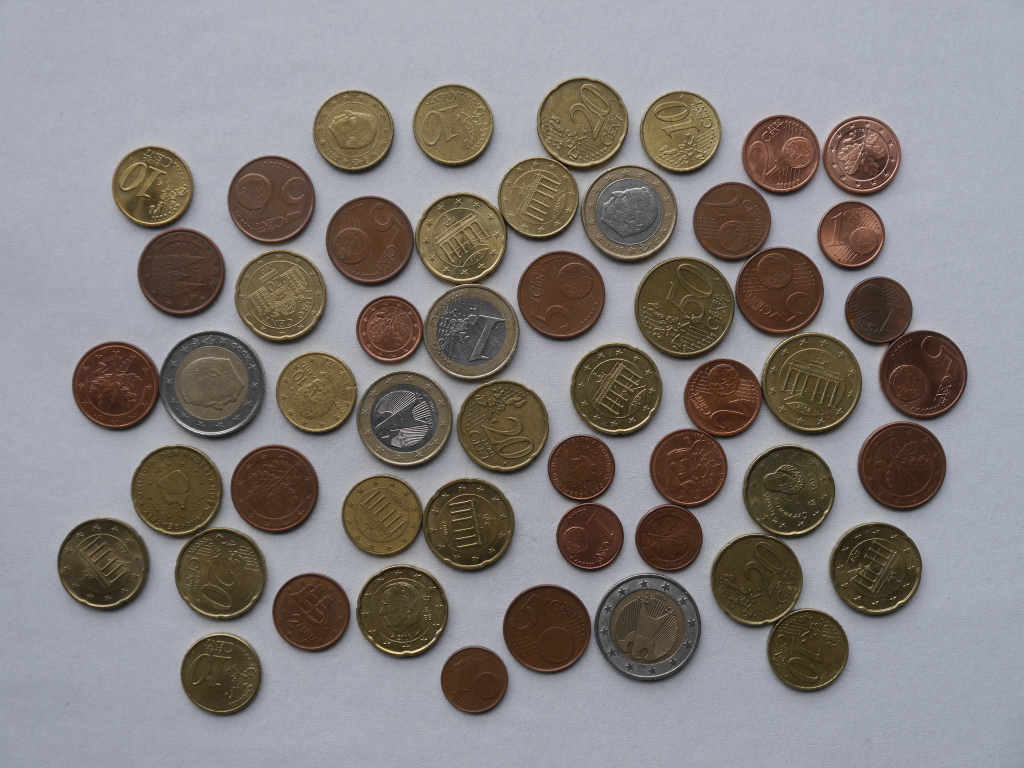 Writting robust (size invariant) circle detection (Watershed ... | Sep 13, 2018 ... I want to detect circles with different sizes. The use case is to detect coins on an image and to extract them solely.
 python - cv2.HoughCircles detects many fake circles but the actual ... | Jan 14, 2024 ... ... Writing robust (color and size invariant) circle detection with OpenCV (based on Hough transform or other features). Hope this helps! Share. c++ - OpenCV: Prevent HoughCircles method from using Canny ... | Nov 24, 2013 ... One very interesting thread is: Writing robust (color and size invariant) circle detection with OpenCV (based on Hough Transform or other ...
 Scale-invariant feature transform - Wikipedia | The scale-invariant feature transform (SIFT) is a computer vision algorithm to detect, describe, and match local features in images, invented by David Lowe ... python - Writing robust (size invariant) circle detection (Watershed ... | Sep 11, 2018 ... ... other approaches of this thread: writing robust (color ... invariant) circle detection with opencv (based on Hough transform or other features).
 A Complete Guide on Hough Transform - Analytics Vidhya | In this article we will be learning in depth about the complete guide on Hough Transform and why is it needed?
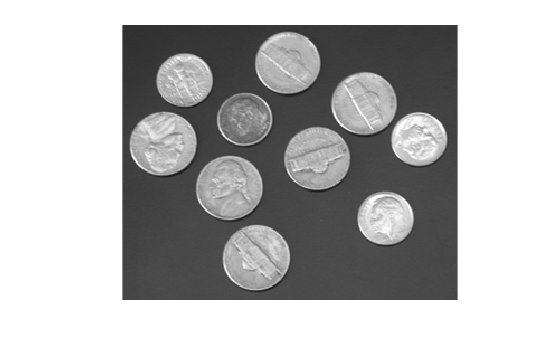 imfindcircles | imfindcircles uses a Circular Hough Transform (CHT) based algorithm for finding circles in images. ... "Size invariant circle detection." Image and Vision ...