Create-React-App Webpack Config Location
This article explains where to find the webpack configuration files within a create-react-app project and how to customize the webpack configuration without ejecting.
This article explains where to find the webpack configuration files within a create-react-app project and how to customize the webpack configuration without ejecting.
This guide delves into the world of Webpack configuration within Create-React-App (CRA), offering a clear roadmap for both understanding and customizing its build process. While CRA provides a streamlined development experience by abstracting away complex configurations, gaining insight into Webpack's inner workings empowers developers to optimize and tailor their projects for specific needs.
While Create-React-App (CRA) hides the complexity of Webpack configuration, understanding its underlying mechanisms can be beneficial for customization and optimization. Let's explore how to work with Webpack in a CRA project:
1. Locating Webpack Configuration:
webpack.config.js file. The configuration resides within the react-scripts package.react-scripts/config/webpack.config.js: Contains the base Webpack configuration for development and production.react-scripts/scripts/: Houses scripts for starting, building, and testing your app, which utilize the Webpack configuration.2. Customizing Webpack Without Ejecting:
INLINE_RUNTIME_CHUNK=false prevents inlining the runtime chunk.react-app-rewired: This popular library lets you modify the Webpack configuration without ejecting. You can create a config-overrides.js file to override specific settings.Example (config-overrides.js):
const webpack = require('webpack');

module.exports = function override(config, env) {
  // Add a custom plugin
  config.plugins.push(
    new webpack.DefinePlugin({
      'process.env.API_URL': JSON.stringify('https://your-api.com'),
    })
  );

  return config;
};3. Ejecting for Advanced Customization:
npm run eject to eject. This creates configuration files in your project, allowing direct modification.4. Understanding Webpack Fundamentals:
5. Common Customization Scenarios:
sass-loader.UglifyJsPlugin for minification.Remember:
By following these steps and exploring the provided resources, you can gain a deeper understanding of Webpack configuration within Create-React-App and tailor it to your specific needs.
This code provides JavaScript examples for customizing Webpack configurations in Create-React-App projects. It covers scenarios like adding custom plugins (e.g., DefinePlugin for environment variables), incorporating custom loaders (e.g., sass-loader for Sass files), and optimizing builds with plugins like UglifyJsPlugin for minification. The examples demonstrate how to use libraries like react-app-rewired and customize-cra to modify Webpack configurations without ejecting from Create-React-App, as well as how to directly edit the webpack.config.js file after ejecting for more advanced control.
While the article provides a comprehensive overview, let's dive into some concrete JavaScript examples for common customization scenarios:
1. Using react-app-rewired to Add a Custom Plugin:
This example demonstrates adding the webpack.DefinePlugin to inject an API URL as an environment variable:
// config-overrides.js
const webpack = require('webpack');

module.exports = function override(config, env) {
  config.plugins.push(
    new webpack.DefinePlugin({
      'process.env.API_URL': JSON.stringify('https://your-api.com'),
    })
  );

  return config;
};
Explanation:
webpack module to access its plugins.override function receives the current Webpack config and the environment (development or production).webpack.DefinePlugin to define environment variables.process.env.API_URL.plugins array in the Webpack config.2. Adding a Custom Loader with react-app-rewired:
Let's add the sass-loader to handle Sass files in your project:
// config-overrides.js
const { override, useBabelRc, addWebpackModuleRule } = require('customize-cra');

module.exports = override(
  useBabelRc(),
  addWebpackModuleRule({
    test: /\.scss$/,
    use: ['style-loader', 'css-loader', 'sass-loader'],
  })
);
Explanation:
customize-cra.useBabelRc allows using a custom .babelrc file.addWebpackModuleRule adds a new rule to handle Sass files..scss.style-loader, css-loader, and sass-loader to process Sass files.3. Optimizing Build with UglifyJsPlugin (After Ejecting):
This example demonstrates adding the UglifyJsPlugin for minification in your production build:
// webpack.config.js (after ejecting)
const UglifyJsPlugin = require('uglifyjs-webpack-plugin');

module.exports = {
  // ... other configuration
  optimization: {
    minimizer: [
      new UglifyJsPlugin({
        uglifyOptions: {
          output: {
            comments: false,
          },
        },
      }),
    ],
  },
};
Explanation:
UglifyJsPlugin.optimization section, we define minimizer.UglifyJsPlugin with options to remove comments.Remember: These are just basic examples. Webpack configuration can be quite complex depending on your needs. Always refer to the official documentation for detailed options and usage.
While the guide covers essential aspects of Webpack configuration in CRA, here are some additional considerations and advanced techniques for further exploration:
1. Code Splitting and Lazy Loading:
import() syntax.React.lazy and Suspense for implementing lazy loading in your React components.2. Analyzing Bundle Size:
webpack-bundle-analyzer to visualize the size and dependencies of your chunks.3. Server-Side Rendering (SSR):
4. Customizing Development Server:
5. Integrating with Other Tools:
6. Keeping Up-to-Date:
Remember:
By exploring these additional considerations and advanced techniques, you can further enhance your Webpack configuration skills and build highly optimized and performant React applications.
| Topic | Description |
|---|---|
| Locating Configuration | - Webpack config is hidden within react-scripts package. - Key files: webpack.config.js (base config) and scripts in react-scripts/scripts/
|
| Customizing Without Ejecting | - Use environment variables (e.g., INLINE_RUNTIME_CHUNK) - react-app-rewired: Override config via config-overrides.js - Craco: More structured approach to overriding |
| Ejecting | - Exposes entire config for full control (irreversible) - Use npm run eject to create config files in your project |
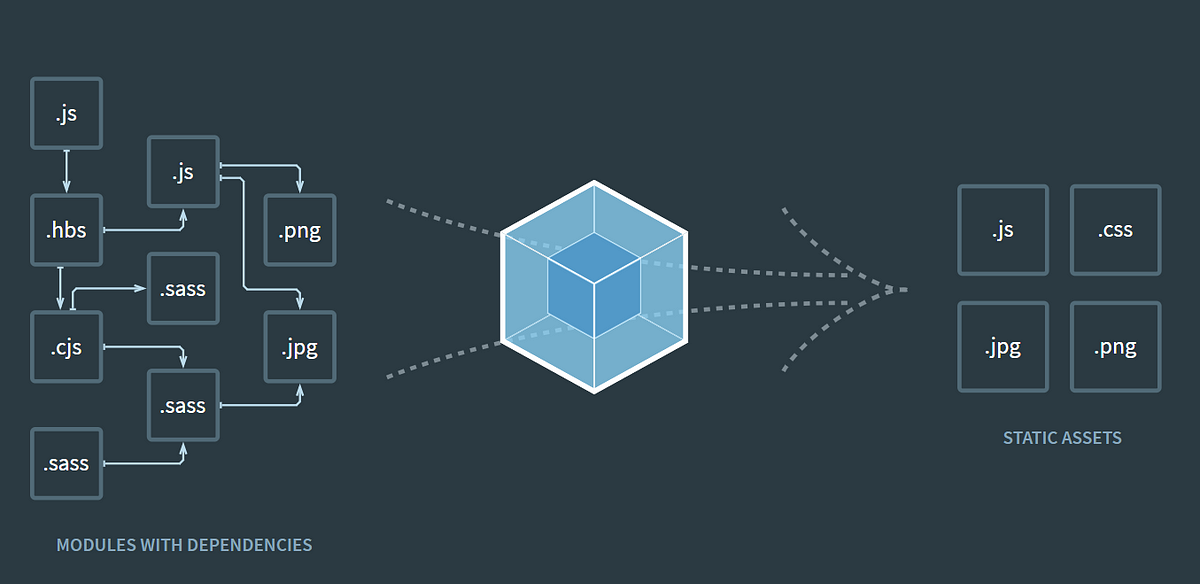
| Webpack Fundamentals | - Entry: Starting point of app - Output: Location and names of bundled files - Loaders: Transform files (e.g., Babel) - Plugins: Perform tasks like optimization and asset management |
| Common Customizations | - Adding custom loaders (e.g., sass-loader) - Optimizing build (e.g., UglifyJsPlugin) - Adding environment variables |
| Key Points | - Consider alternatives before ejecting. - Understand Webpack basics for effective configuration. - Start with small customizations and gradually progress. |
In conclusion, while Create-React-App simplifies the initial setup and development process by abstracting away Webpack configurations, understanding how Webpack works and how to customize it empowers developers to fine-tune their projects for optimal performance, scalability, and maintainability. Whether through environment variables, libraries like react-app-rewired and Craco, or ejecting for full control, developers have a range of options to tailor the build process to their specific needs. By carefully considering the trade-offs between convenience and customization, and by leveraging the wealth of resources and tools available, developers can harness the power of Webpack to build robust and efficient React applications.
 Overriding the Create-React-App Webpack Configuration Without ... | Create-React-App is a great tool to bootstrap React apps, but it can be quite painful when you need fine-grained control over the Webpack configuration.
 Customize webpack configuration of React App created with Create ... | It was Saturday night hanging around to solve the issue of “ReferenceError: legacyLib is not defined” in my React+Typescript app. I was…
 How to create a React application with Webpack | This article goes over how to create a React application using Webpack 5.
 The best webpack configurations for React applications - LogRocket ... | If you've struggled to configure webpack for your React app, look no further. We cover both generic and specific config needs.
 Advanced Configuration | Create React App | You can adjust various development and production settings by setting environment variables in your shell or with .env.