Tensorflow
Understanding TensorBoard Histograms: A Guide to Weights
Learn how to use TensorBoard weight histograms to visualize the distribution of weights in your neural network and debug training issues.
Learn how to use TensorBoard weight histograms to visualize the distribution of weights in your neural network and debug training issues.

TensorBoard histograms are powerful tools for visualizing the distribution of tensors, such as weights and gradients, during your model's training process. Understanding these histograms can provide valuable insights into your model's learning behavior and help you diagnose potential issues.
TensorBoard histograms visualize the distribution of a tensor (like weights or gradients) over time. Here's how to interpret them:
# Log a histogram of your weights
writer.add_histogram('layer1_weights', layer1.weights, epoch)
Interpreting Weight Histograms:
Interpreting Gradient Histograms:
Example:
Imagine a histogram for layer weights. If you see the distribution shifting towards zero and becoming narrower, it means your weights are converging and potentially becoming smaller in magnitude. This could be a sign of your model learning.
This Python code defines and trains a simple neural network model using TensorFlow and logs histograms of weights and gradients to TensorBoard. It creates a two-layer model, defines an optimizer and loss function, generates random training data, and trains the model for a set number of epochs. During training, it logs histograms of the weights, biases, and gradients of the first layer to TensorBoard. Finally, it closes the TensorBoard writer. This code demonstrates how to use TensorBoard to visualize the distribution of weights and gradients during training, which can be helpful for debugging and optimizing neural networks.
import tensorflow as tf
import numpy as np

# Define a simple model
model = tf.keras.models.Sequential([
  tf.keras.layers.Dense(10, activation='relu', input_shape=(100,)),
  tf.keras.layers.Dense(1)
])

# Define optimizer and loss
optimizer = tf.keras.optimizers.Adam(learning_rate=0.01)
loss_fn = tf.keras.losses.MeanSquaredError()

# Create dummy data
x_train = np.random.rand(1000, 100)
y_train = np.random.rand(1000, 1)

# Create TensorBoard writer
writer = tf.summary.create_file_writer('logs/histogram_example')

# Training loop
epochs = 10
for epoch in range(epochs):
  with tf.GradientTape() as tape:
    predictions = model(x_train)
    loss = loss_fn(y_train, predictions)

  gradients = tape.gradient(loss, model.trainable_variables)
  optimizer.apply_gradients(zip(gradients, model.trainable_variables))

  # Log histograms for weights and gradients of the first layer
  with writer.as_default():
    tf.summary.histogram('layer1_weights', model.layers[0].weights[0], step=epoch)
    tf.summary.histogram('layer1_biases', model.layers[0].weights[1], step=epoch)
    tf.summary.histogram('layer1_gradients', gradients[0], step=epoch)

  print(f"Epoch {epoch+1}, Loss: {loss.numpy()}")

# Close the writer
writer.close()
Explanation:
tf.summary.histogram() to log histograms of:
model.layers[0].weights[0])model.layers[0].weights[1])gradients[0])To view the histograms:
tensorboard --logdir logs/histogram_example
Now you can analyze the histograms in TensorBoard to observe how the weight and gradient distributions change over epochs. Look for patterns like shifting, narrowing, vanishing gradients, or exploding gradients to gain insights into your model's training process.
| Feature | Description | Interpretation |
|---|---|---|
| What it visualizes | Distribution of a tensor (e.g., weights, gradients) over time | |
| Lines | Each line represents a different timestep (epoch or iteration) | |
| X-axis | Value range of the tensor | |
| Y-axis | Frequency/density of values within that range | |
| Code Example | writer.add_histogram('layer1_weights', layer1.weights, epoch) |
Logs the histogram of layer1.weights at a specific epoch
|
Interpreting Weight Histograms:
| Pattern | Meaning |
|---|---|
| Shifting distribution (left/right) | Weights are generally decreasing/increasing |
| Narrowing distribution | Weights are converging towards a specific range |
| Wide/flat distribution | Weights haven't learned much yet |
Interpreting Gradient Histograms:
| Pattern | Meaning |
|---|---|
| Concentration around zero | Vanishing gradients |
| Very high peaks (far from zero) | Exploding gradients |
Example:
A weight histogram shifting towards zero and becoming narrower suggests:
TensorBoard histograms are essential for understanding the dynamic behavior of tensors like weights and gradients during training. By visualizing their distributions over time, you can gain insights into your model's learning process. Shifting distributions indicate changing weight values, while narrowing distributions suggest convergence. Observing these patterns, alongside other metrics, helps diagnose issues like vanishing or exploding gradients, ultimately leading to better model understanding and performance. Remember that while histograms are powerful, combining them with other visualization techniques provides a more comprehensive view of your model's inner workings.
 python - What does this peculiar Tensorboard histogram mean ... | Sep 3, 2020 ... The histograms you see are weight distributions of two dense layers. Every dense layer has weights (w1, w2, .., wn) and a bias (b) .
 Deep Dive Into TensorBoard: Tutorial With Examples | Comprehensive TensorBoard tutorial, from dashboard insights and visualizations to integration nuances and its limitations.
 Using Tensorboard. Learn how to use Tensorboard to debug… | by ... | Learn how to use Tensorboard to debug and optimize your network
 When do you know that your neural network is learning something ... | Aug 10, 2022 ... ... weight initialization or the learning rate.”,. however from: Stack Overflow - Understanding TensorBoard (weight) histograms I've understood ...
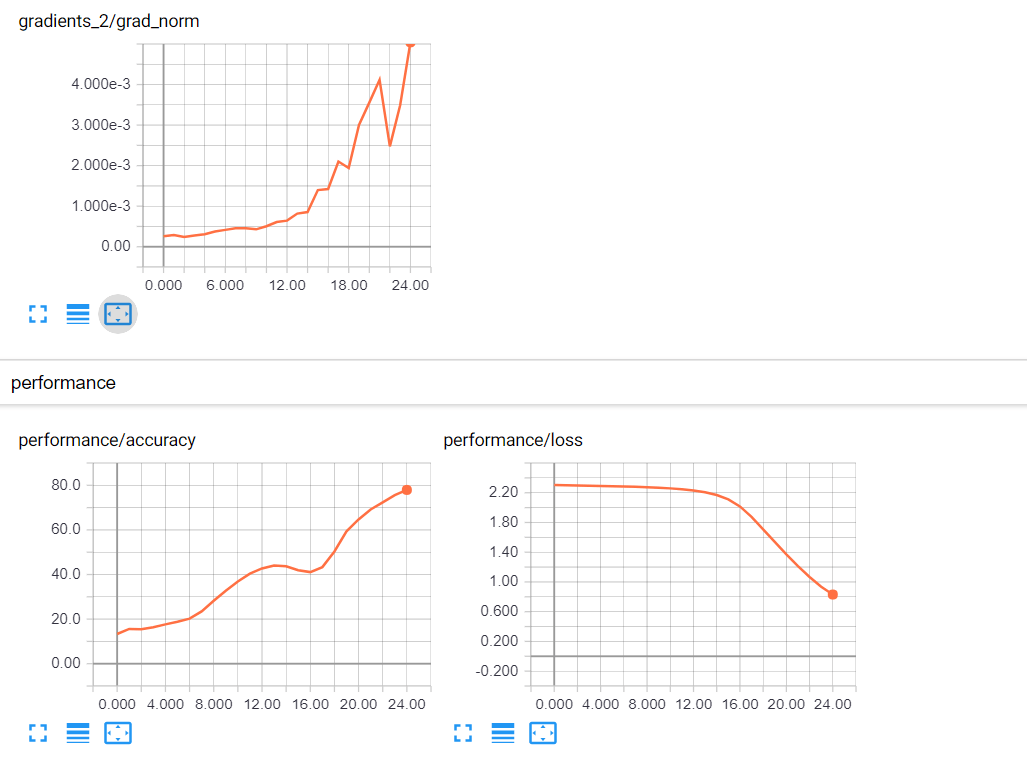 TensorBoard Analysis Thumb rules that work for me. | by Omar ... | Thumb rule #1:
 Need a cool-looking visualization of my ANN - Deep Learning - fast ... | Hey guys, I have a somewhat goofy request. I need to make a cool-looking picture of my basic ANN for marketing purposes. I was thinking something like graphing the activation functions of the individual nodes or something stupid like that. I know it sounds dumb but doing something similar has worked for me in the past. We were talking with some investors a few years ago who were on the fence about partnering with us. They were unwilling to make a final decision, but what ended up selling them w...
 How to detect vanishing and exploding gradients with Tensorboard ... | Feb 19, 2020 ... As you are in search of exploding / vanishing gradients, it would be the best to check the gradient histogram, rather than the weights ...