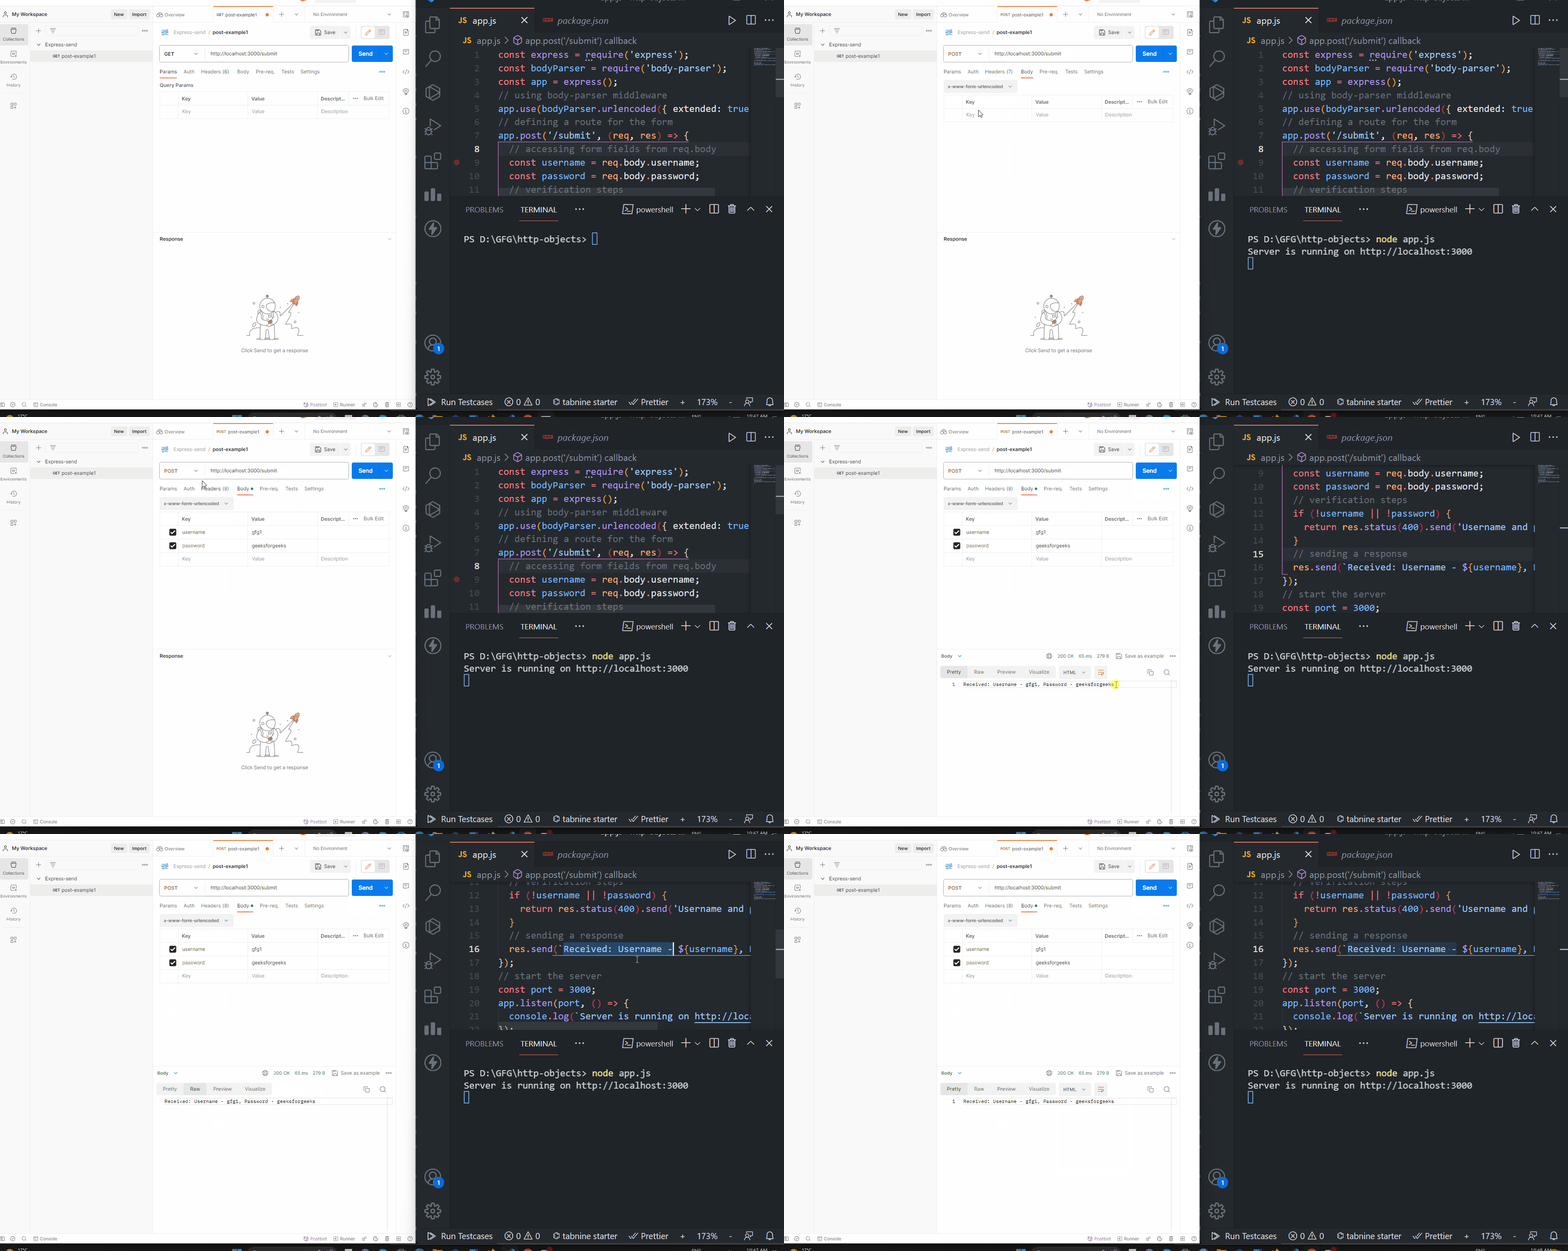
Access POST Form Fields in Express.js
Learn how to easily access and work with data submitted through POST forms in your Express.js applications, including handling different data types and potential errors.
Learn how to easily access and work with data submitted through POST forms in your Express.js applications, including handling different data types and potential errors.
This guide will walk you through the process of accessing data submitted through POST forms in your Express.js application. We'll cover setting up your Express app, parsing form data, creating a POST route, accessing form fields, and handling different data types. You'll also find an example HTML form and additional tips for building robust form handling in your applications.
Here's how to access data submitted through POST forms in your Express.js application:
1. Setting Up Your Express App:
npm init -y. Install Express using:npm install expressapp.js) and set up a basic Express application:const express = require('express');
const app = express();
// ... your routes and middleware will go here
app.listen(3000, () => {
console.log('Server listening on port 3000');
});2. Parsing Form Data:
body-parser middleware:npm install body-parserapp.js, require body-parser and use it to parse URL-encoded form data:const bodyParser = require('body-parser');
app.use(bodyParser.urlencoded({ extended: false })); // For simple forms
// app.use(bodyParser.urlencoded({ extended: true })); // For more complex forms with nested objects3. Creating a POST Route:
app.post('/submit-form', (req, res) => {
  // Access form data here
  const username = req.body.username;
  const email = req.body.email;

  // ... process the data (e.g., store in database, send email)

  res.send('Form data received!');
});
4. Accessing Form Fields:
req.body object contains the parsed form data. Access individual fields using their names as properties:const username = req.body.username;
const email = req.body.email;5. Handling Different Form Data Types:
multer.bodyParser.json().Example HTML Form:
<form action="/submit-form" method="post">
<label for="username">Username:</label>
<input type="text" id="username" name="username">
<label for="email">Email:</label>
<input type="email" id="email" name="email">
<button type="submit">Submit</button>
</form>Remember:
method attribute is set to post.name attributes of your form fields correspond to the properties in req.body.Additional Tips:
express-validator.By following these steps, you can effectively handle POST form data in your Express.js applications and build interactive web experiences.
This code provides an example of handling POST form submissions in Express.js. It uses the 'body-parser' middleware to parse incoming form data and access it within a defined route handler. The example demonstrates accessing 'username' and 'email' fields from the submitted form and logging them to the console. Additionally, it includes a sample HTML form for testing the functionality.
This code demonstrates how to access data from a POST form in Express.js:
const express = require('express');
const bodyParser = require('body-parser');
const app = express();
// Use body-parser middleware to parse urlencoded form data
app.use(bodyParser.urlencoded({ extended: false }));
// Define a route for handling form submissions
app.post('/submit-form', (req, res) => {
// Access form data from req.body
const username = req.body.username;
const email = req.body.email;
// Process the data (e.g., store in database, send email)
console.log(`Username: ${username}, Email: ${email}`);
// Send a response
res.send('Form data received!');
});
// Start the server
app.listen(3000, () => {
console.log('Server listening on port 3000');
});Explanation:
express and body-parser modules.bodyParser.urlencoded({ extended: false }) is used to parse incoming form data with URL encoding./submit-form endpoint, which will be triggered when a POST request is made to this URL.req.body. The username and email fields correspond to the name attributes of the input fields in your HTML form.Example HTML Form (save as index.html):
<!DOCTYPE html>
<html>
<head>
<title>Form Example</title>
</head>
<body>
<form action="/submit-form" method="post">
  <label for="username">Username:</label>
  <input type="text" id="username" name="username">

  <label for="email">Email:</label>
  <input type="email" id="email" name="email">

  <button type="submit">Submit</button>
</form>
</body>
</html>To run this example:
app.js and the HTML code as index.html in the same directory.node app.js.http://localhost:3000.Security Considerations:
express-validator for comprehensive validation.csurf to generate and validate CSRF tokens.Error Handling:
Advanced Techniques:
multer or similar middleware to handle file uploads securely. Pay attention to file size limits, allowed file types, and storage mechanisms.quill or ckeditor to provide a user-friendly editing experience.axios or the Fetch API to make asynchronous requests.Testing:
mocha or jest to create and run your tests.Best Practices:
| Step | Description |
|---|---|
| 1 | Set Up Express App |
- Install Express with npm install express
|
|
- Create app.js with basic Express app structure |
|
| 2 | Parse Form Data |
- Install body-parser with npm install body-parser
|
|
- Use app.use(bodyParser.urlencoded({ extended: false })) middleware |
|
| 3 | Create POST Route |
- Define route handler for form's POST request (e.g., /submit-form) |
|
| 4 | Access Form Fields |
- Use req.body object to access fields (e.g., req.body.username) |
|
| 5 | Handle Different Data Types |
- Use multer for file uploads |
|
- Use bodyParser.json() for JSON data |
In conclusion, mastering POST form handling in Express.js empowers you to build dynamic and interactive web applications. By following the outlined steps and incorporating best practices, you can effectively collect, process, and utilize user-submitted data. Remember to prioritize security through validation, sanitization, and CSRF protection. As you explore advanced techniques like file uploads and AJAX submissions, you'll unlock even greater possibilities for creating engaging and user-friendly web experiences.
 How to access POST form fields in Express JS? - GeeksforGeeks | A Computer Science portal for geeks. It contains well written, well thought and well explained computer science and programming articles, quizzes and practice/competitive programming/company interview Questions.
 Express Tutorial Part 6: Working with forms - Learn web development | Express, node, and third-party packages on npm provide everything you need to add forms to your website. In this article, you've learned how to create forms using Pug, validate and sanitize input using express-validator, and add, delete, and modify records in the database.
 Handling any POST data in Express | Request body data will be placed to req.body . A few examples for decoding popular request data formats: application/x-www-form-urlencoded; application/json ...
 How to Access POST Form Fields in Express | Better Stack Community | Better Stack lets you see inside any stack, debug any issue, and resolve any incident.
 How to Send Data From a Form and Receive It with Express.js | by ... | I am practicing with forms and Express.js how to send data and how to catch it and this will be a great way to create a web page who will…
 ExpressJS - Form data | ExpressJS - Form data - Forms are an integral part of the web. Almost every website we visit offers us forms that submit or fetch some information for us. To get started with forms, we will first install the body-parser(for parsing JSON and url-encoded data) and multer(for parsing multipart/form data) middleware.
 Using Netlify functions, fetch POST request won't send from within ... | For context, I have a Serverless function that uses Express to receive data from a Webhook Event. The first callback receives that data, the second callback should obtain an access token and post our data to an external server using fetch Post requests. The code works well locally testing with Postman, but when I deploy to Netlify, run a Postman test and check the Netlify logs, the logs show the data is received, but then just stop before the fetch post request i.e. they don’t show any error r...