Machine Vision
Top Face Recognition Libraries for Accurate Identification
Discover the top face recognition libraries empowering developers to build cutting-edge facial recognition applications.
Discover the top face recognition libraries empowering developers to build cutting-edge facial recognition applications.

Face recognition, once a futuristic concept, is now a common feature in our devices and applications. This technology relies on powerful algorithms to identify and analyze faces within images or videos. This article provides a practical guide to implementing face recognition in Python, covering key steps and code examples.
Choose a library: Popular choices include Dlib, OpenCV, MTCNN, RetinaFace, and DeepFace. Each has strengths and weaknesses in speed, accuracy, and resource usage.
import dlib
import cv2
Load pre-trained models: Most libraries offer pre-trained models for face detection and sometimes recognition.
detector = dlib.get_frontal_face_detector()Input image: Load the image you want to analyze.
image = cv2.imread("path/to/image.jpg")Detect faces: Use the library's face detection function.
faces = detector(image)Extract face landmarks (optional): For tasks like alignment or recognition, you might need facial landmarks.
predictor = dlib.shape_predictor("shape_predictor_68_face_landmarks.dat")
landmarks = predictor(image, faces[0])
Face recognition (optional): If you need to identify individuals, use a face recognition model.
from deepface import DeepFace
result = DeepFace.verify(img1_path = "img1.jpg", img2_path = "img2.jpg")
print(result["verified"])
Process results: Use the detected faces, landmarks, or recognition results for your application.
for face in faces:
    x1, y1, x2, y2 = face.left(), face.top(), face.right(), face.bottom()
cv2.rectangle(image, (x1, y1), (x2, y2), (0, 255, 0), 2)This Python code performs face detection and landmark extraction on an image using dlib and OpenCV libraries. It first loads pre-trained models for face detection and landmark prediction. Then, it reads an image from a specified path and detects faces using the dlib face detector. For each detected face, it draws a bounding box and extracts 68 facial landmarks. The code also includes an optional face recognition step using DeepFace, which compares two detected faces in the image and prints whether they match. Finally, it displays the processed image with bounding boxes and landmarks.
import cv2
import dlib
from deepface import DeepFace

# **1. Choose a library and load pre-trained models**
detector = dlib.get_frontal_face_detector()
predictor = dlib.shape_predictor("shape_predictor_68_face_landmarks.dat")  # Download the model: http://dlib.net/files/shape_predictor_68_face_landmarks.dat.bz2

# **2. Input image**
image_path = "path/to/your/image.jpg"  # Replace with your image path
image = cv2.imread(image_path)

# **3. Detect faces**
faces = detector(image)

# **4. Extract face landmarks and process results**
for face in faces:
    x1, y1, x2, y2 = face.left(), face.top(), face.right(), face.bottom()
    cv2.rectangle(image, (x1, y1), (x2, y2), (0, 255, 0), 2)  # Draw bounding box

    # Extract landmarks
    landmarks = predictor(image, face)
    for n in range(0, 68):
        x = landmarks.part(n).x
        y = landmarks.part(n).y
        cv2.circle(image, (x, y), 2, (255, 0, 0), -1)  # Draw landmarks

# **5. Face recognition (optional)**
if len(faces) >= 2:
    face1 = dlib.rectangle(faces[0].left(), faces[0].top(), faces[0].right(), faces[0].bottom())
    face2 = dlib.rectangle(faces[1].left(), faces[1].top(), faces[1].right(), faces[1].bottom())
    result = DeepFace.verify(img1_path=image, img2_path=image, detector_backend="dlib", enforce_detection=False, regions=[face1, face2])
    print(f"Faces match: {result['verified']}")

# Display the image
cv2.imshow("Face Detection", image)
cv2.waitKey(0)
cv2.destroyAllWindows()
Explanation:
cv2 for image processing, dlib for face detection and landmarks, and DeepFace for face recognition.cv2.imread().detector(image) to detect faces in the image.cv2.rectangle().predictor(image, face).cv2.circle().DeepFace.verify() to compare the faces and determine if they match.cv2.imshow().Remember:
shape_predictor_68_face_landmarks.dat model file and provide its correct path in the code.opencv-python, dlib, deepface."path/to/your/image.jpg" with the actual path to your image.Choosing a Library:
Pre-trained Models:
Face Landmarks:
Face Recognition:
Performance:
Additional Tips:
Resources:
This article provides a concise guide to performing face recognition in Python.
Key Steps:
Example Code Snippet (Dlib):
import dlib
import cv2

# Load face detector and shape predictor
detector = dlib.get_frontal_face_detector()
predictor = dlib.shape_predictor("shape_predictor_68_face_landmarks.dat")

# Load image
image = cv2.imread("path/to/image.jpg")

# Detect faces
faces = detector(image)

# Process each detected face
for face in faces:
    # Extract bounding box coordinates
    x1, y1, x2, y2 = face.left(), face.top(), face.right(), face.bottom()

    # Draw rectangle around the face
    cv2.rectangle(image, (x1, y1), (x2, y2), (0, 255, 0), 2)

    # Extract landmarks (optional)
    landmarks = predictor(image, face)
    # ... process landmarks ...

# Display or save the processed image
cv2.imshow("Output", image)
cv2.waitKey(0)
This summary provides a basic understanding of the Python face recognition process. Remember to explore the chosen library's documentation for detailed functionalities and customization options.
Face recognition technology has become increasingly prevalent in various applications, ranging from security systems to social media platforms. By leveraging Python libraries like Dlib, OpenCV, and DeepFace, developers can readily implement face detection, landmark extraction, and recognition functionalities. The process involves choosing a suitable library, loading pre-trained models, inputting images, detecting faces, optionally extracting landmarks, and performing face recognition if required. The extracted information can then be used for various purposes, such as user authentication, image tagging, or emotion analysis. As with any powerful technology, it's crucial to consider the ethical implications and potential biases associated with face recognition and ensure its responsible and ethical deployment.
 Top 10 Open Source Facial Recognition libraries and tools - Twine ... | A look at 10 of the top open-source libraries and tools for adding real-time facial recognition capabilities to your AI model.
 machine learning - Best Python library for face recognition - Data ... | Nov 20, 2023 ... In my opinion, you should compare the two models Facenet and SphereFace2 . The second one is quite new. And for training the first one, Google ...
 image processing - Face recognition Library - Stack Overflow | Jun 5, 2009 ... I'm happy with a library in Python, Java, C++, C or something like that. The best thing would be if it can be run on a Windows machine because I ...
 What is the Best Facial Recognition Software to Use in 2022 ... | I checked dozens of free and paid facial recognition services. Here's what I learned
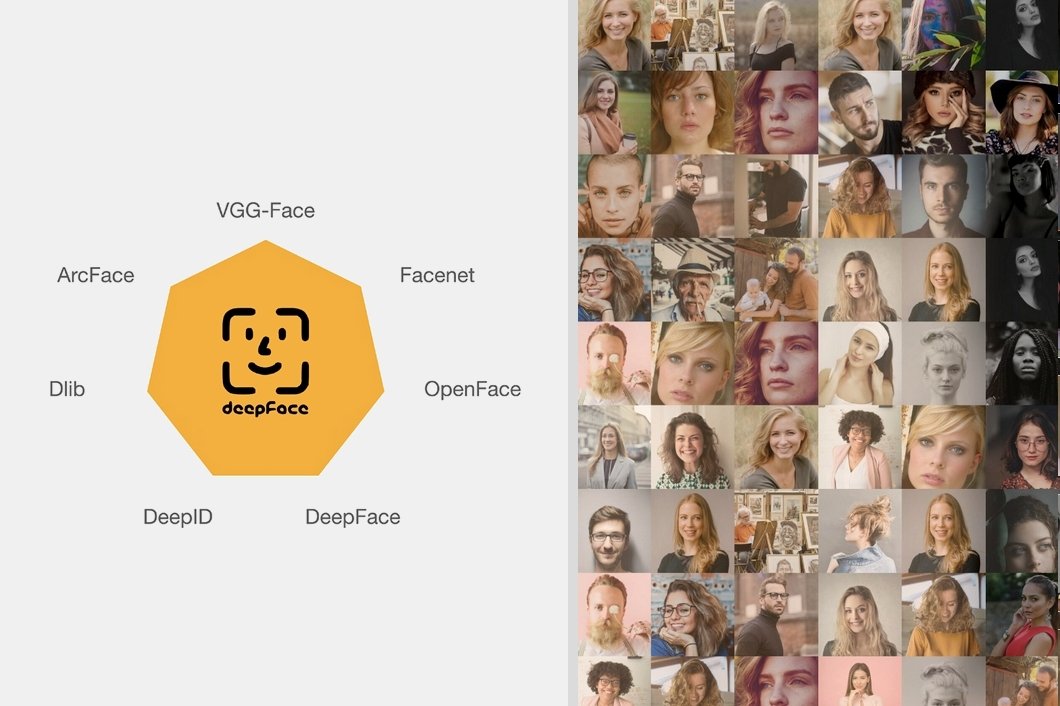 DeepFace: A Popular Open Source Facial Recognition Library - viso.ai | How to use the DeepFace Library to apply Deep Face Recognition and Facial Attribute Analysis with the most powerful Face Recognition models.
 Re: Including face recognition data when importing... - Adobe ... | Lightroom Classic will not import an Apple Photos library at all. The import function it still has is for Apple iPhoto, the predecessor of Apple Photos. So you would have to use Avalanche to have any chance of success.
  Automatic face tagging - Feature Requests - PhotoStructure Forum | From what’s next 🤖 Add ML-powered face-and-thing tagging. As always with PhotoStructure, all computation happens locally on your computer. Your data stays yours. Note that “face tagging” is actually a pretty substantial bit of work that will be shipped in several steps: Extract and browse by face/person tags already embedded in metadata/google takeouts (this will ship in v1.0.0) Add ML-powered face detection and aggregation (v1.1 – this will leverage existing face locii produced ...